About the Project
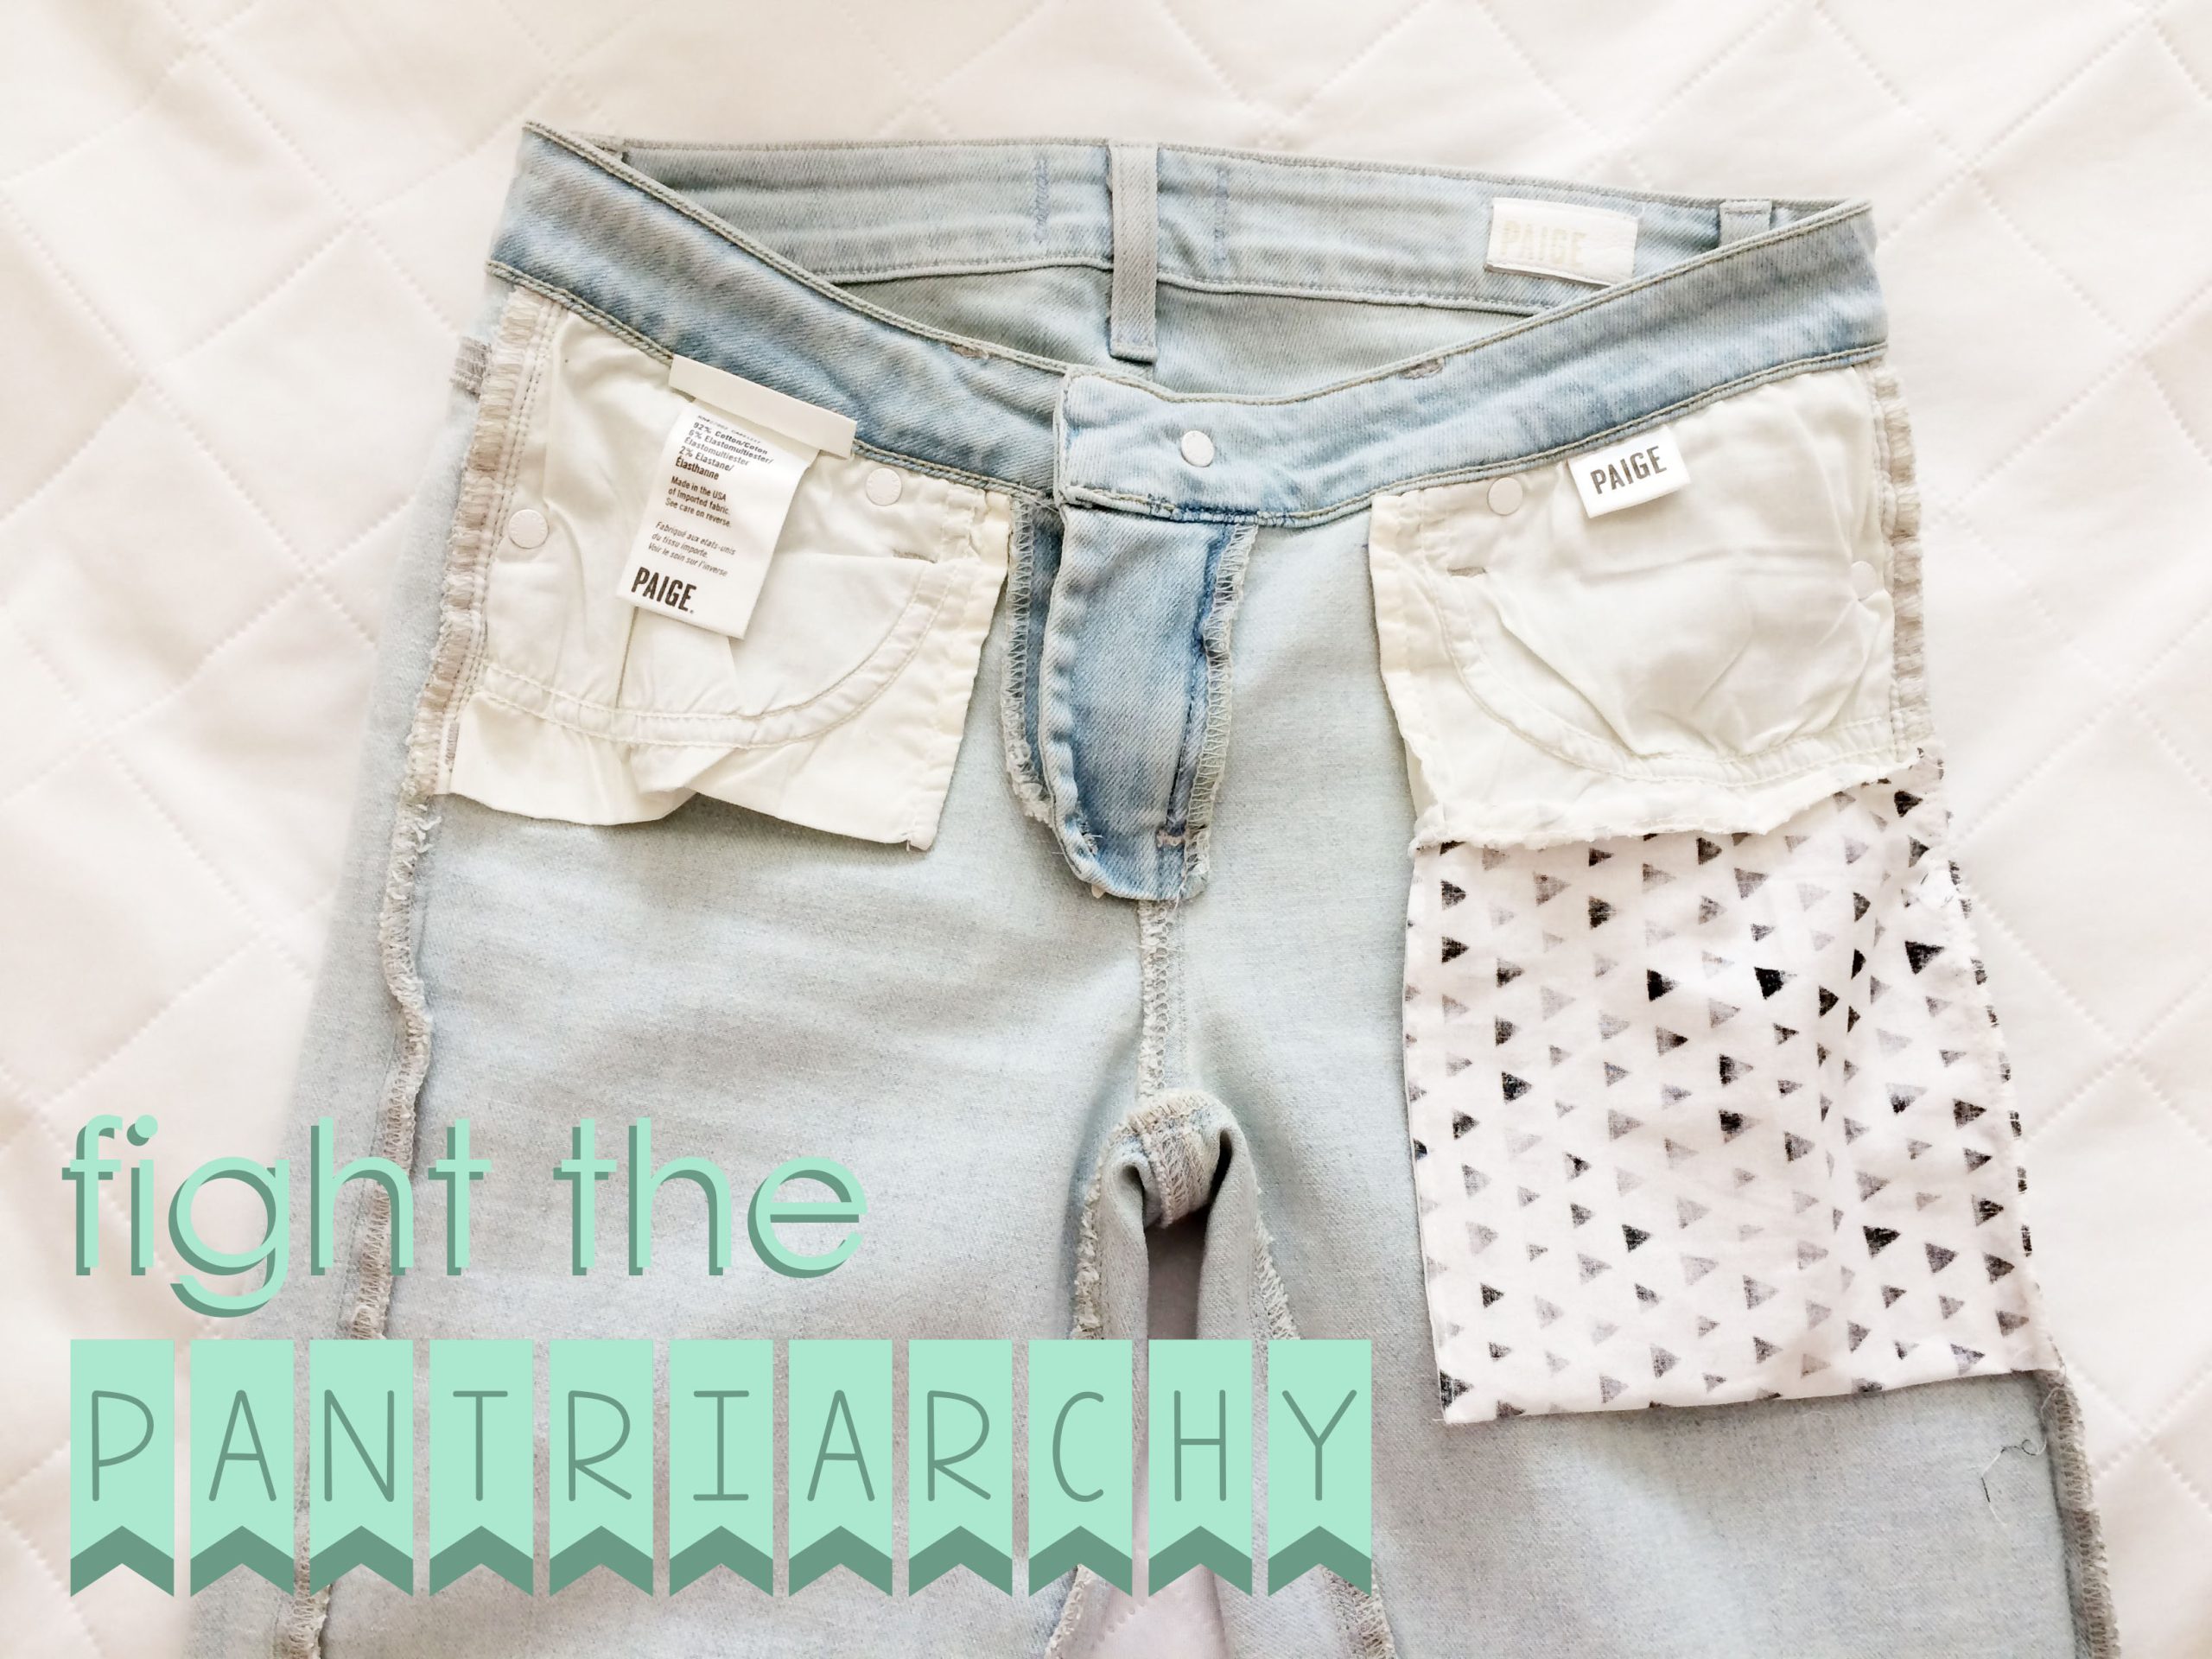
Equal rights? Our pants don’t even have equal rights! Fight the patriarchy by reclaiming your pockets. We deserve better than this!
I don’t usually do sewing tutorials because I’m not the best at sewing, but if you have a basic understanding of sewing, you should be able to muddle through! Basically what we’re doing is cutting the bottom out of shallow pockets, then adding a supplemental pocket of any depth desired! The nice thing with this tutorial is that you can customize the size and fabric. This is also an excellent way to use up little fabric scraps that you can’t bear to throw away.
A note on fabric choice – if you are working w/ thin or light-colored pants, be aware that the pattern/color of the pocket add-on may be seen through the pants. Test the fabric before you commit to anything! As for what kind of fabric, I’d recommend lightweight cotton. We want it to be thin and similar to a commercially made pocket’s fabric.
See the photo gallery for step-by-step photo instructions.
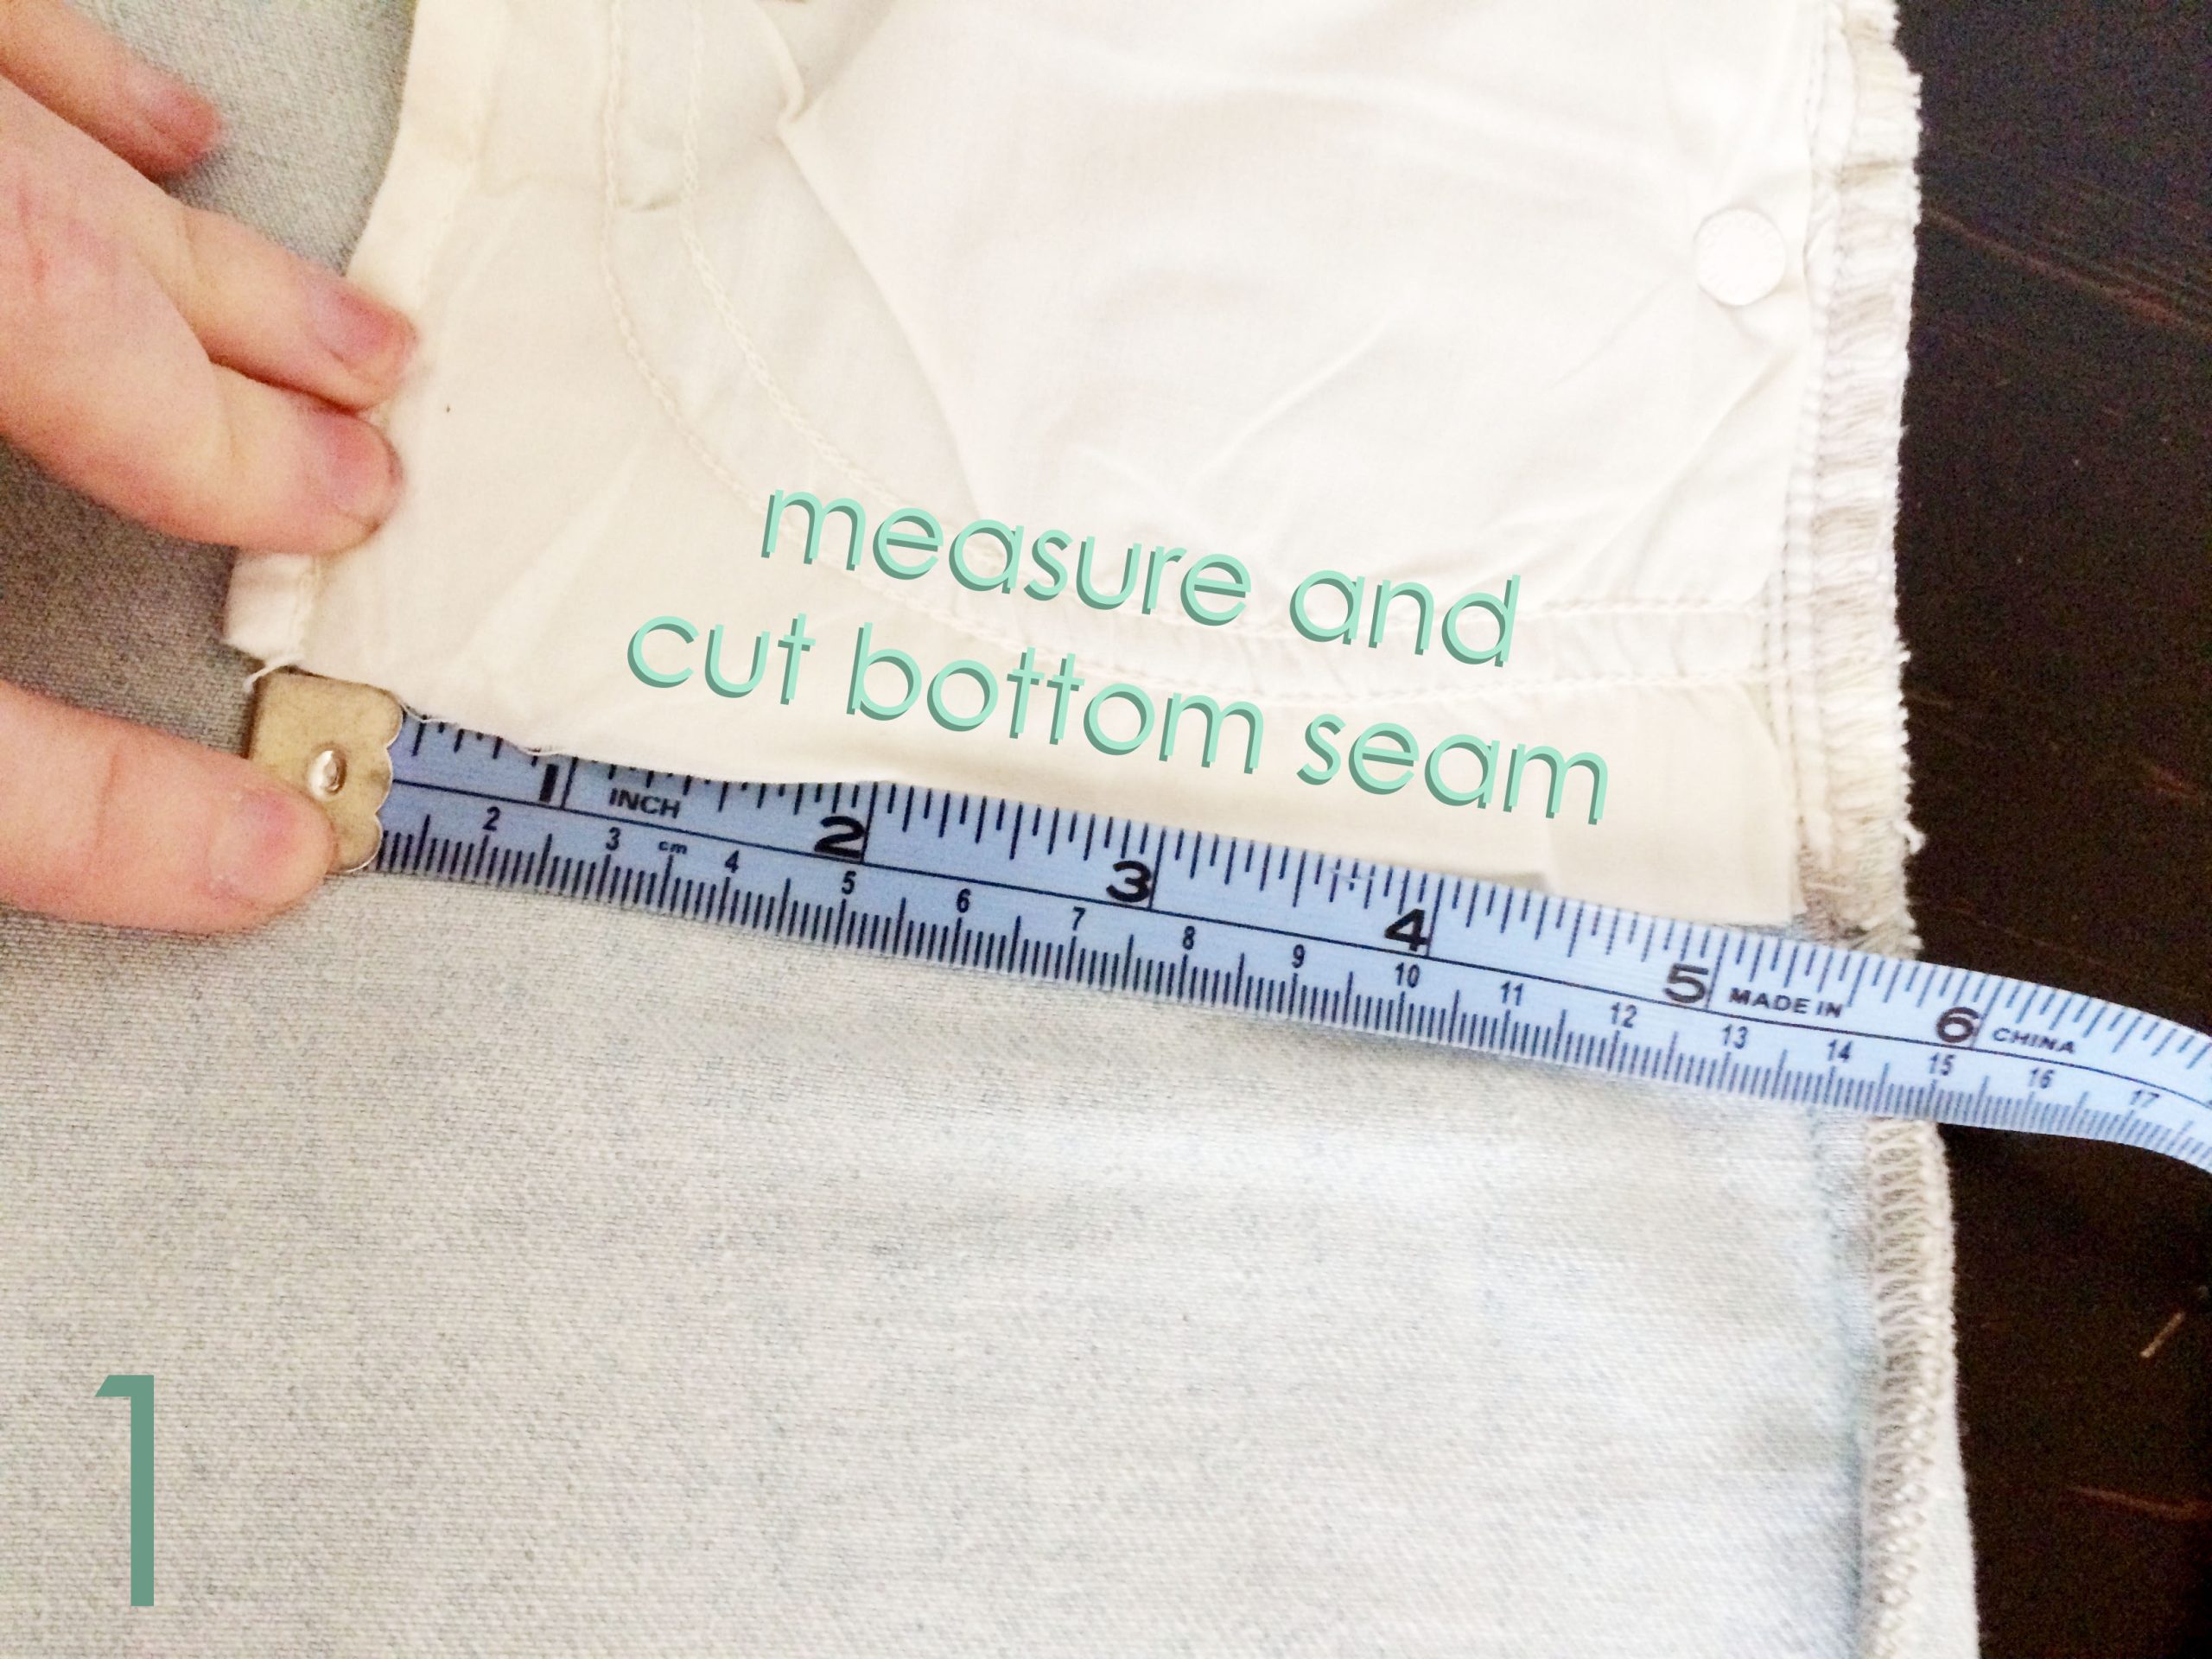
- Turn pants inside out. Flatten out the original pocket. Measure the bottom fold of the pocket. Cut the bottom fold of the original pocket to side seams. Leave side seams in place!
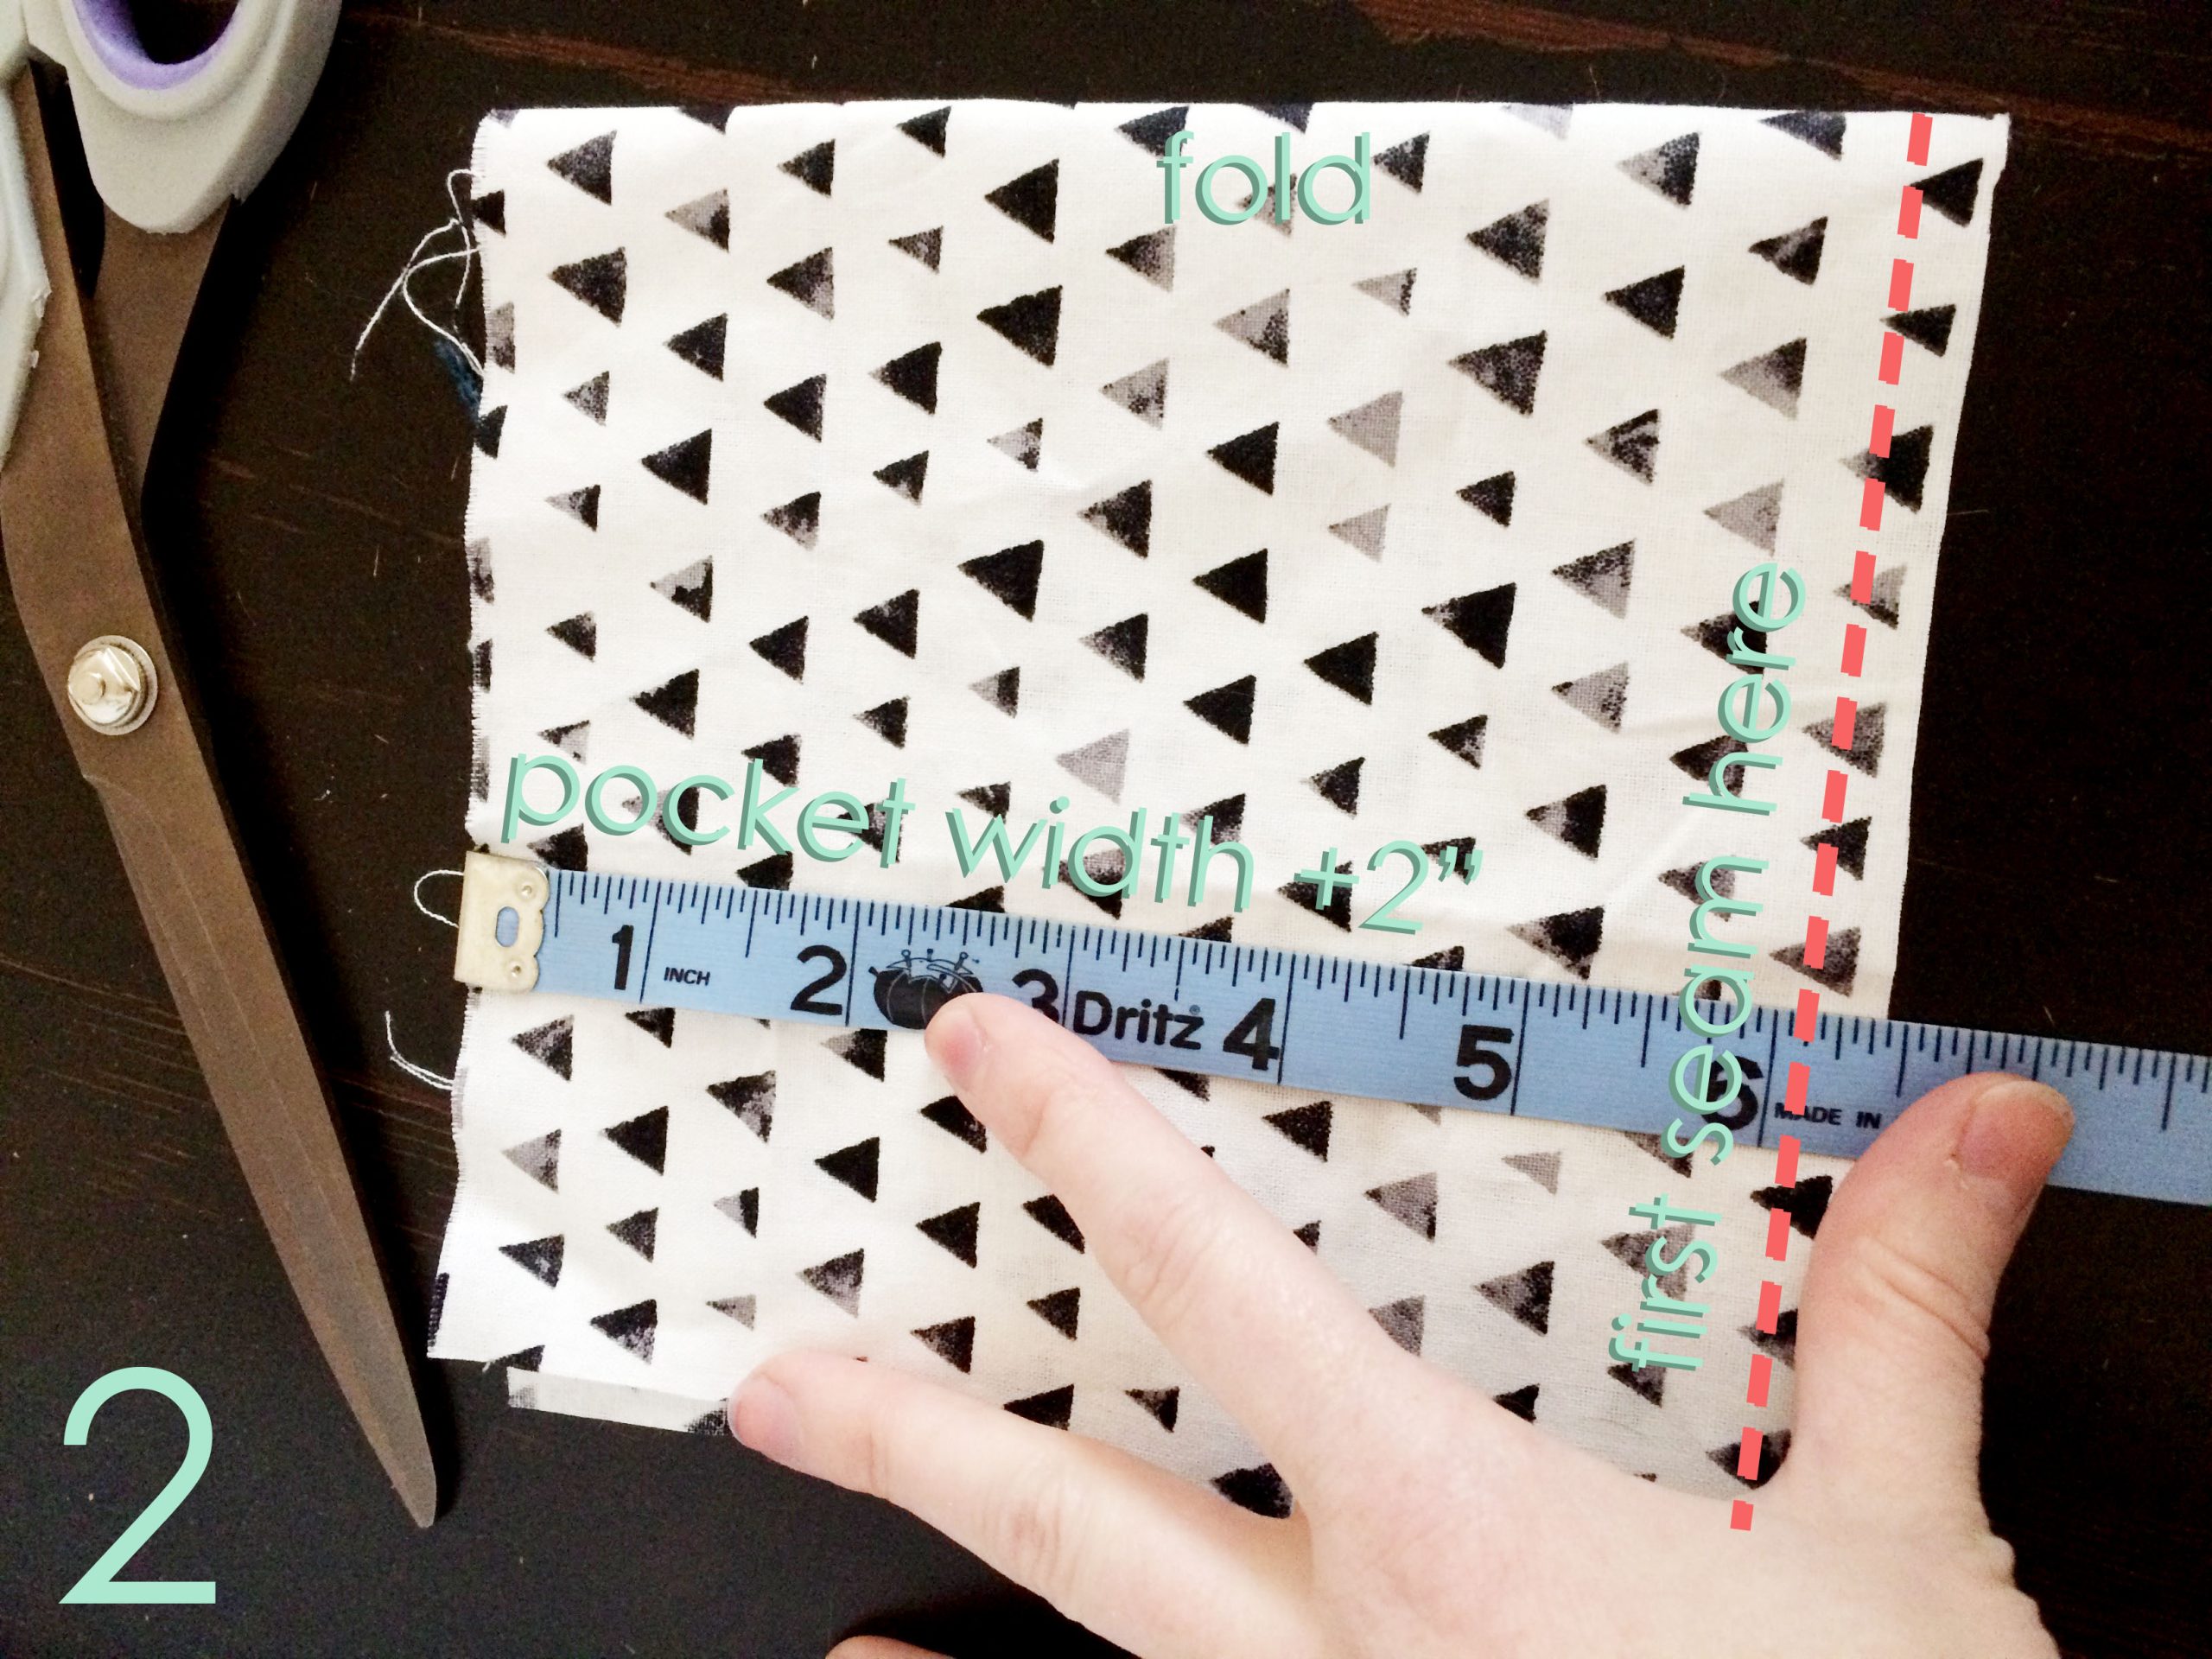
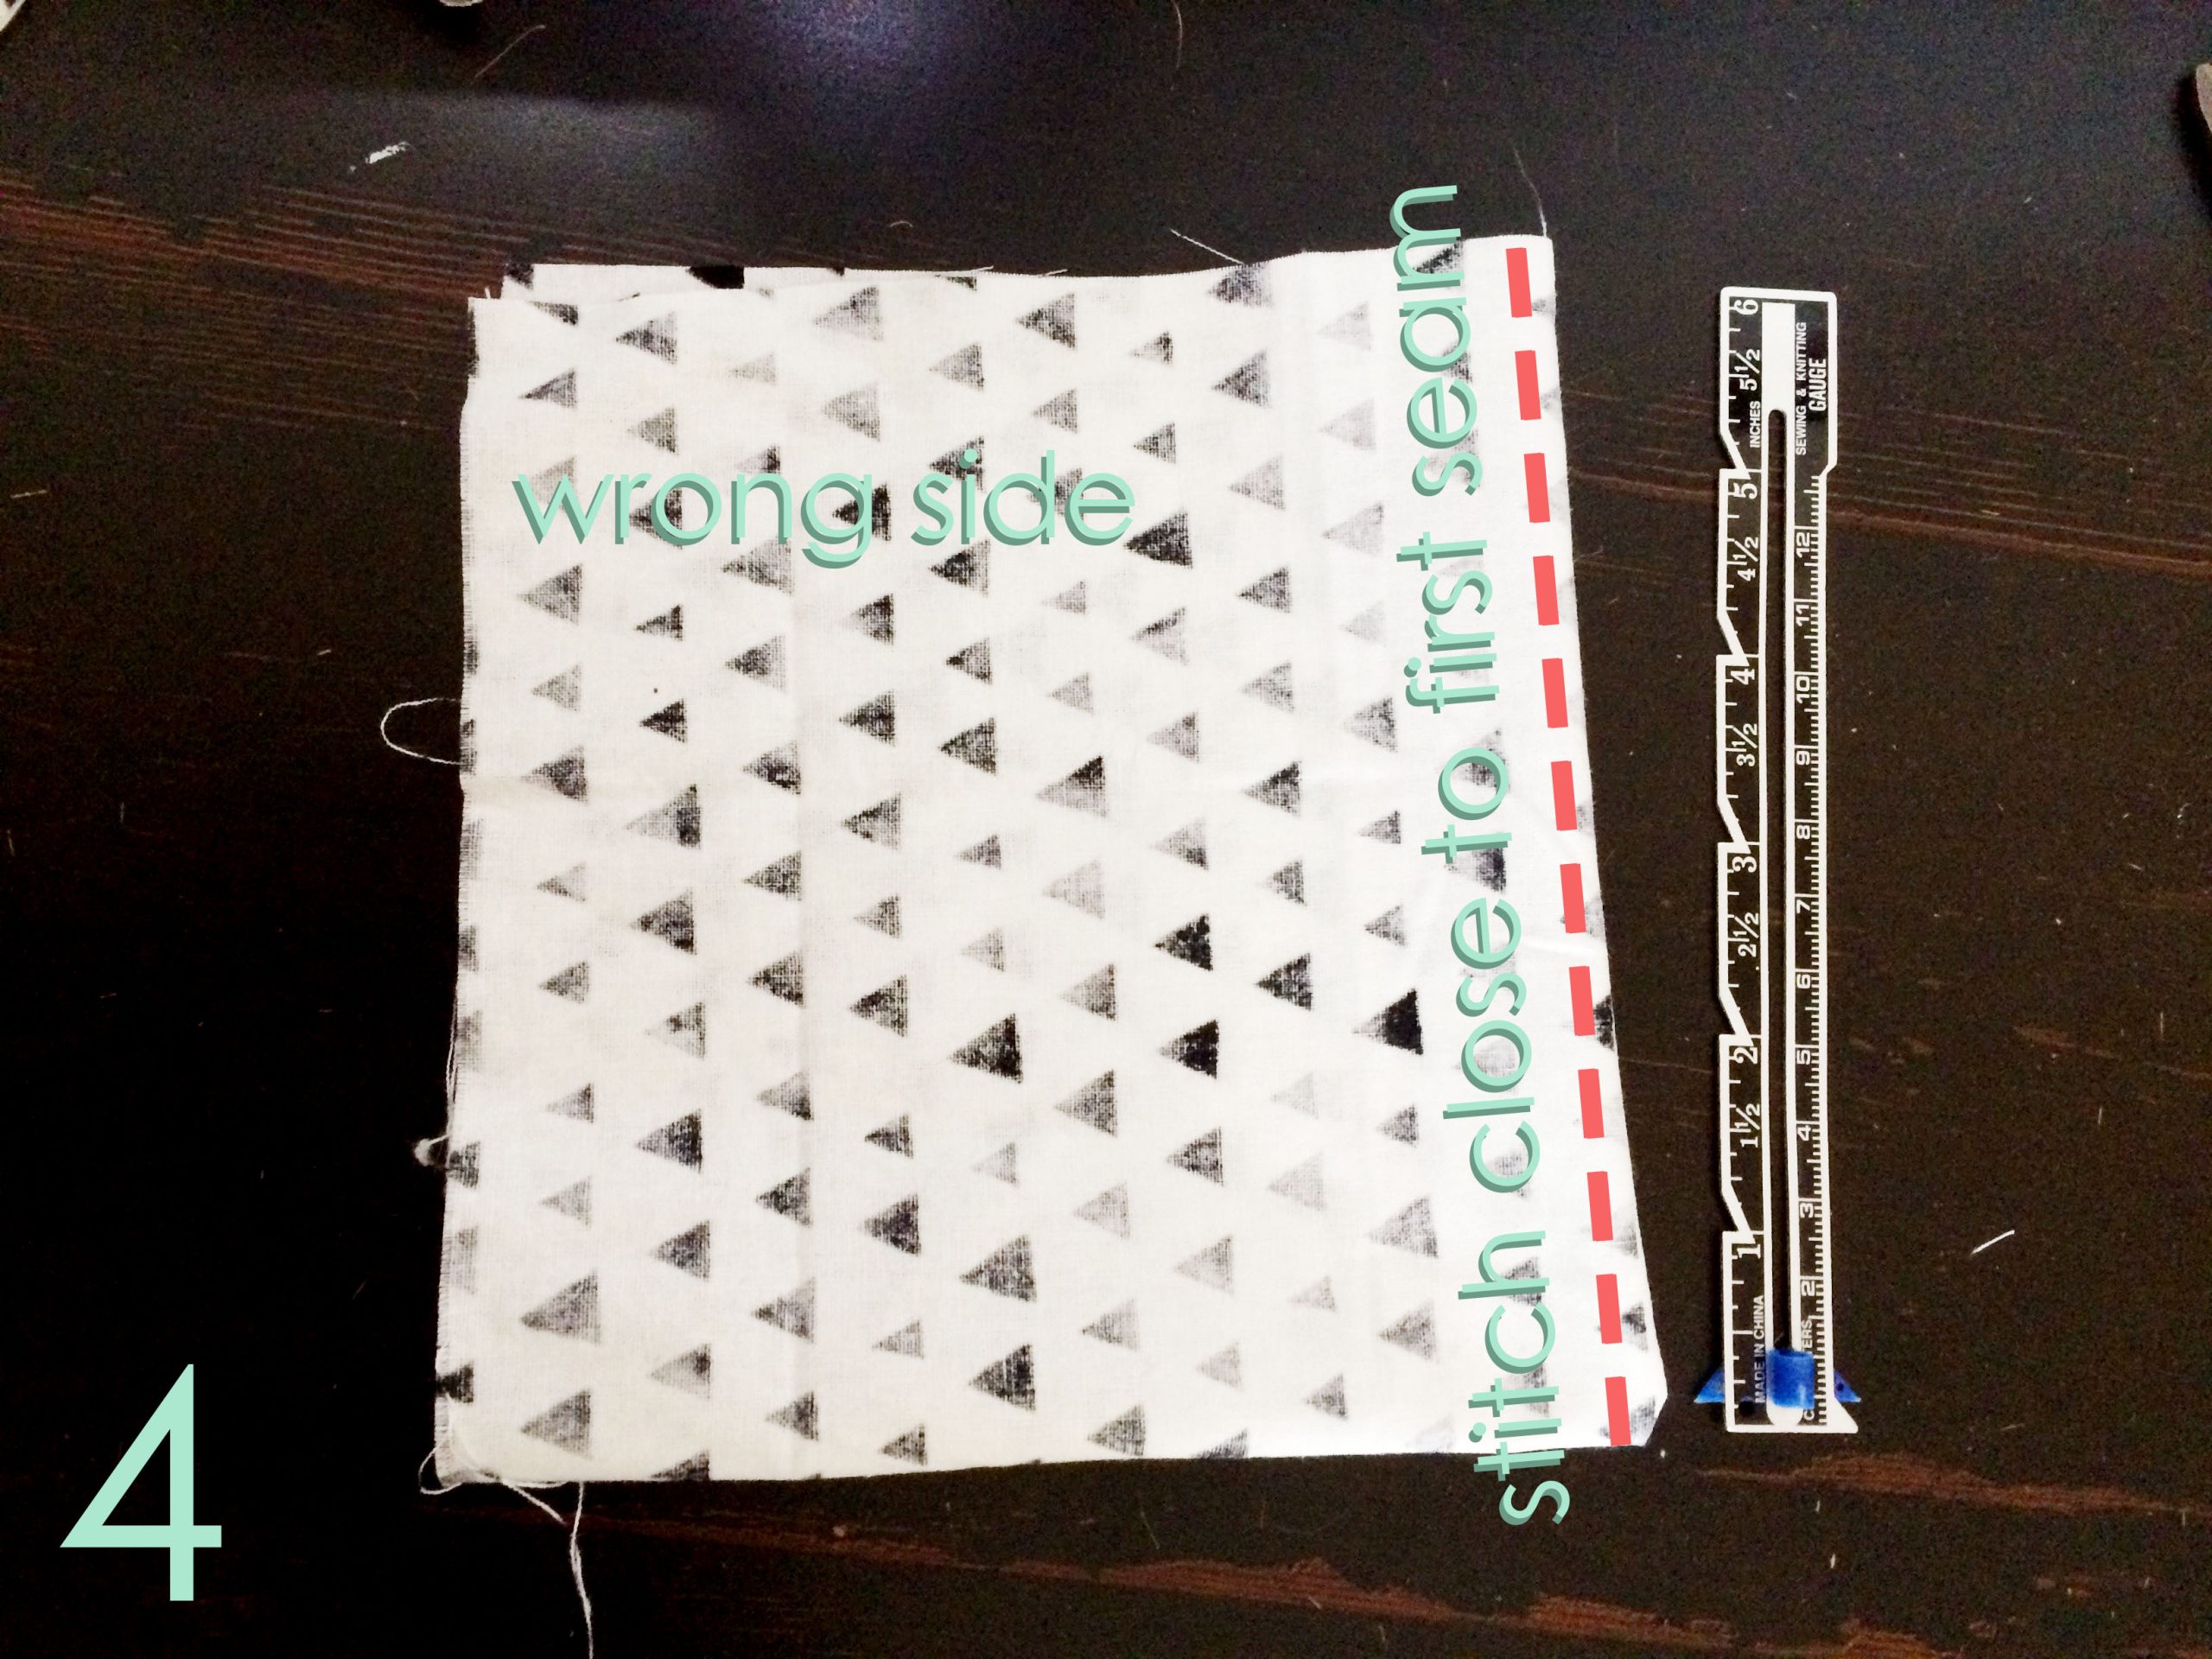
- With a piece of scrap fabric, measure the original pocket width +2” for seams. Cut the fabric to width. Determine how deep you want the new pocket. Fold the fabric over and cut to the desired depth (do not cut the fold!). The new pocket fabric will measure twice the desired depth if unfolded. Note the seam line in this pic!
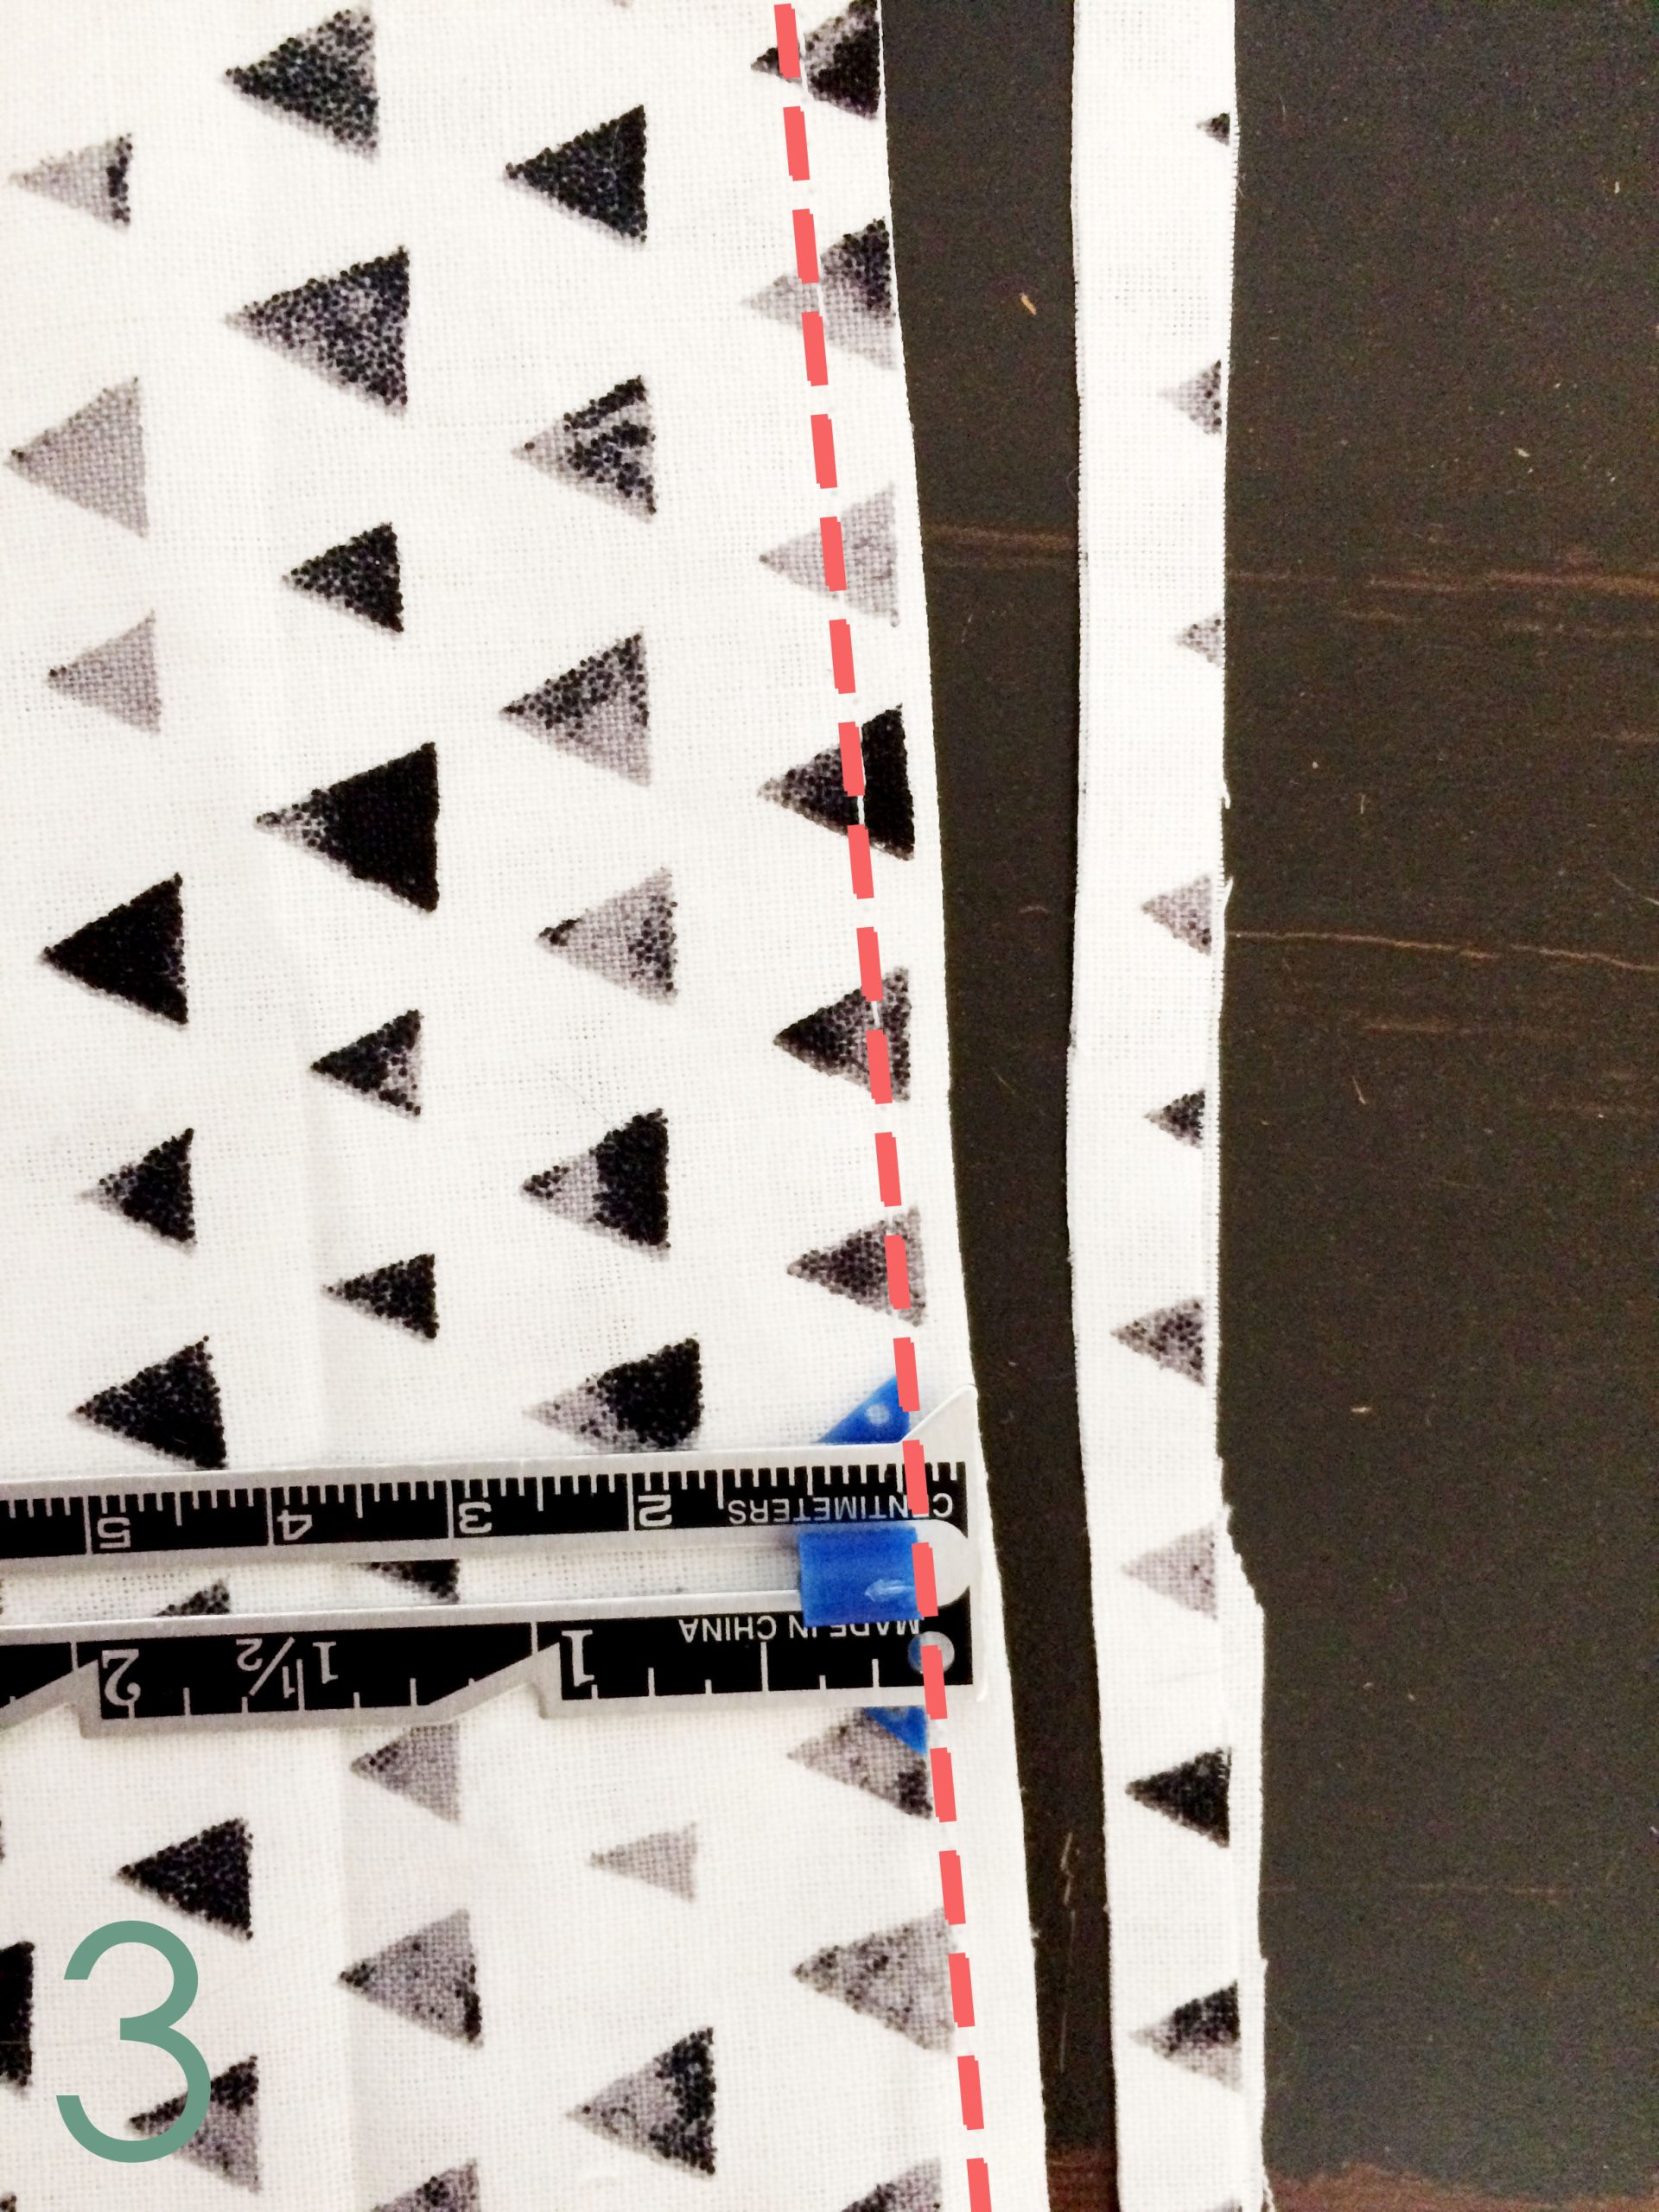
- With wrong-sides together, stitch one of the side seams as shown in step 2 (one of the sides next to the fold, not the top) ½” from the edge. Trim the selvage close to the seam line as shown.
- Turn the new pocket so the wrong-side is out. The seam should now be on the inside. Top stitch over the same seam, no more than ¼” from the edge.
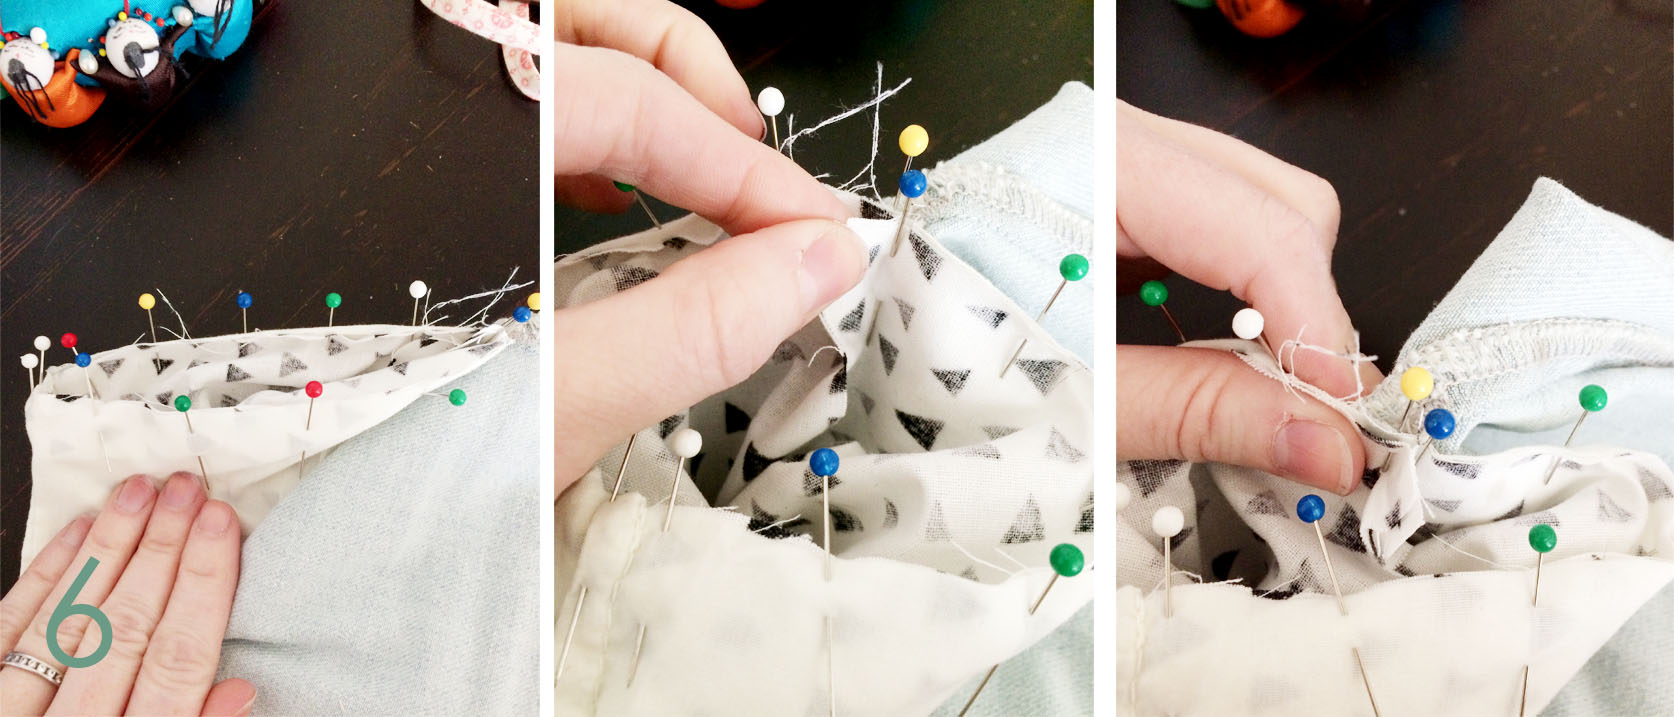
- Turn the new pocket so the right-side is out again. Put the new pocket through the inside of the old pocket so that right-sides (insides) are touching. The side with the seam needs to be on the crotch-side of the pants. The side without the seam needs to be on the outside of the pants. The fold will go up through the original pocket so the last open side is at the bottom of the original pocket.
- Starting from the seam-side, pin the bottom edge of the original pocket to the top edge of the new pocket. At the side opposite side seam, there should be about ¾” extra fabric. Pinch the extra and pin right next to it as pictured. Stitch around the pinned area, making sure to leave that extra ¾” on either edge free! We’ll need it in a minute. Zigzag the raw edges if you want a tidy job after washing the pants.
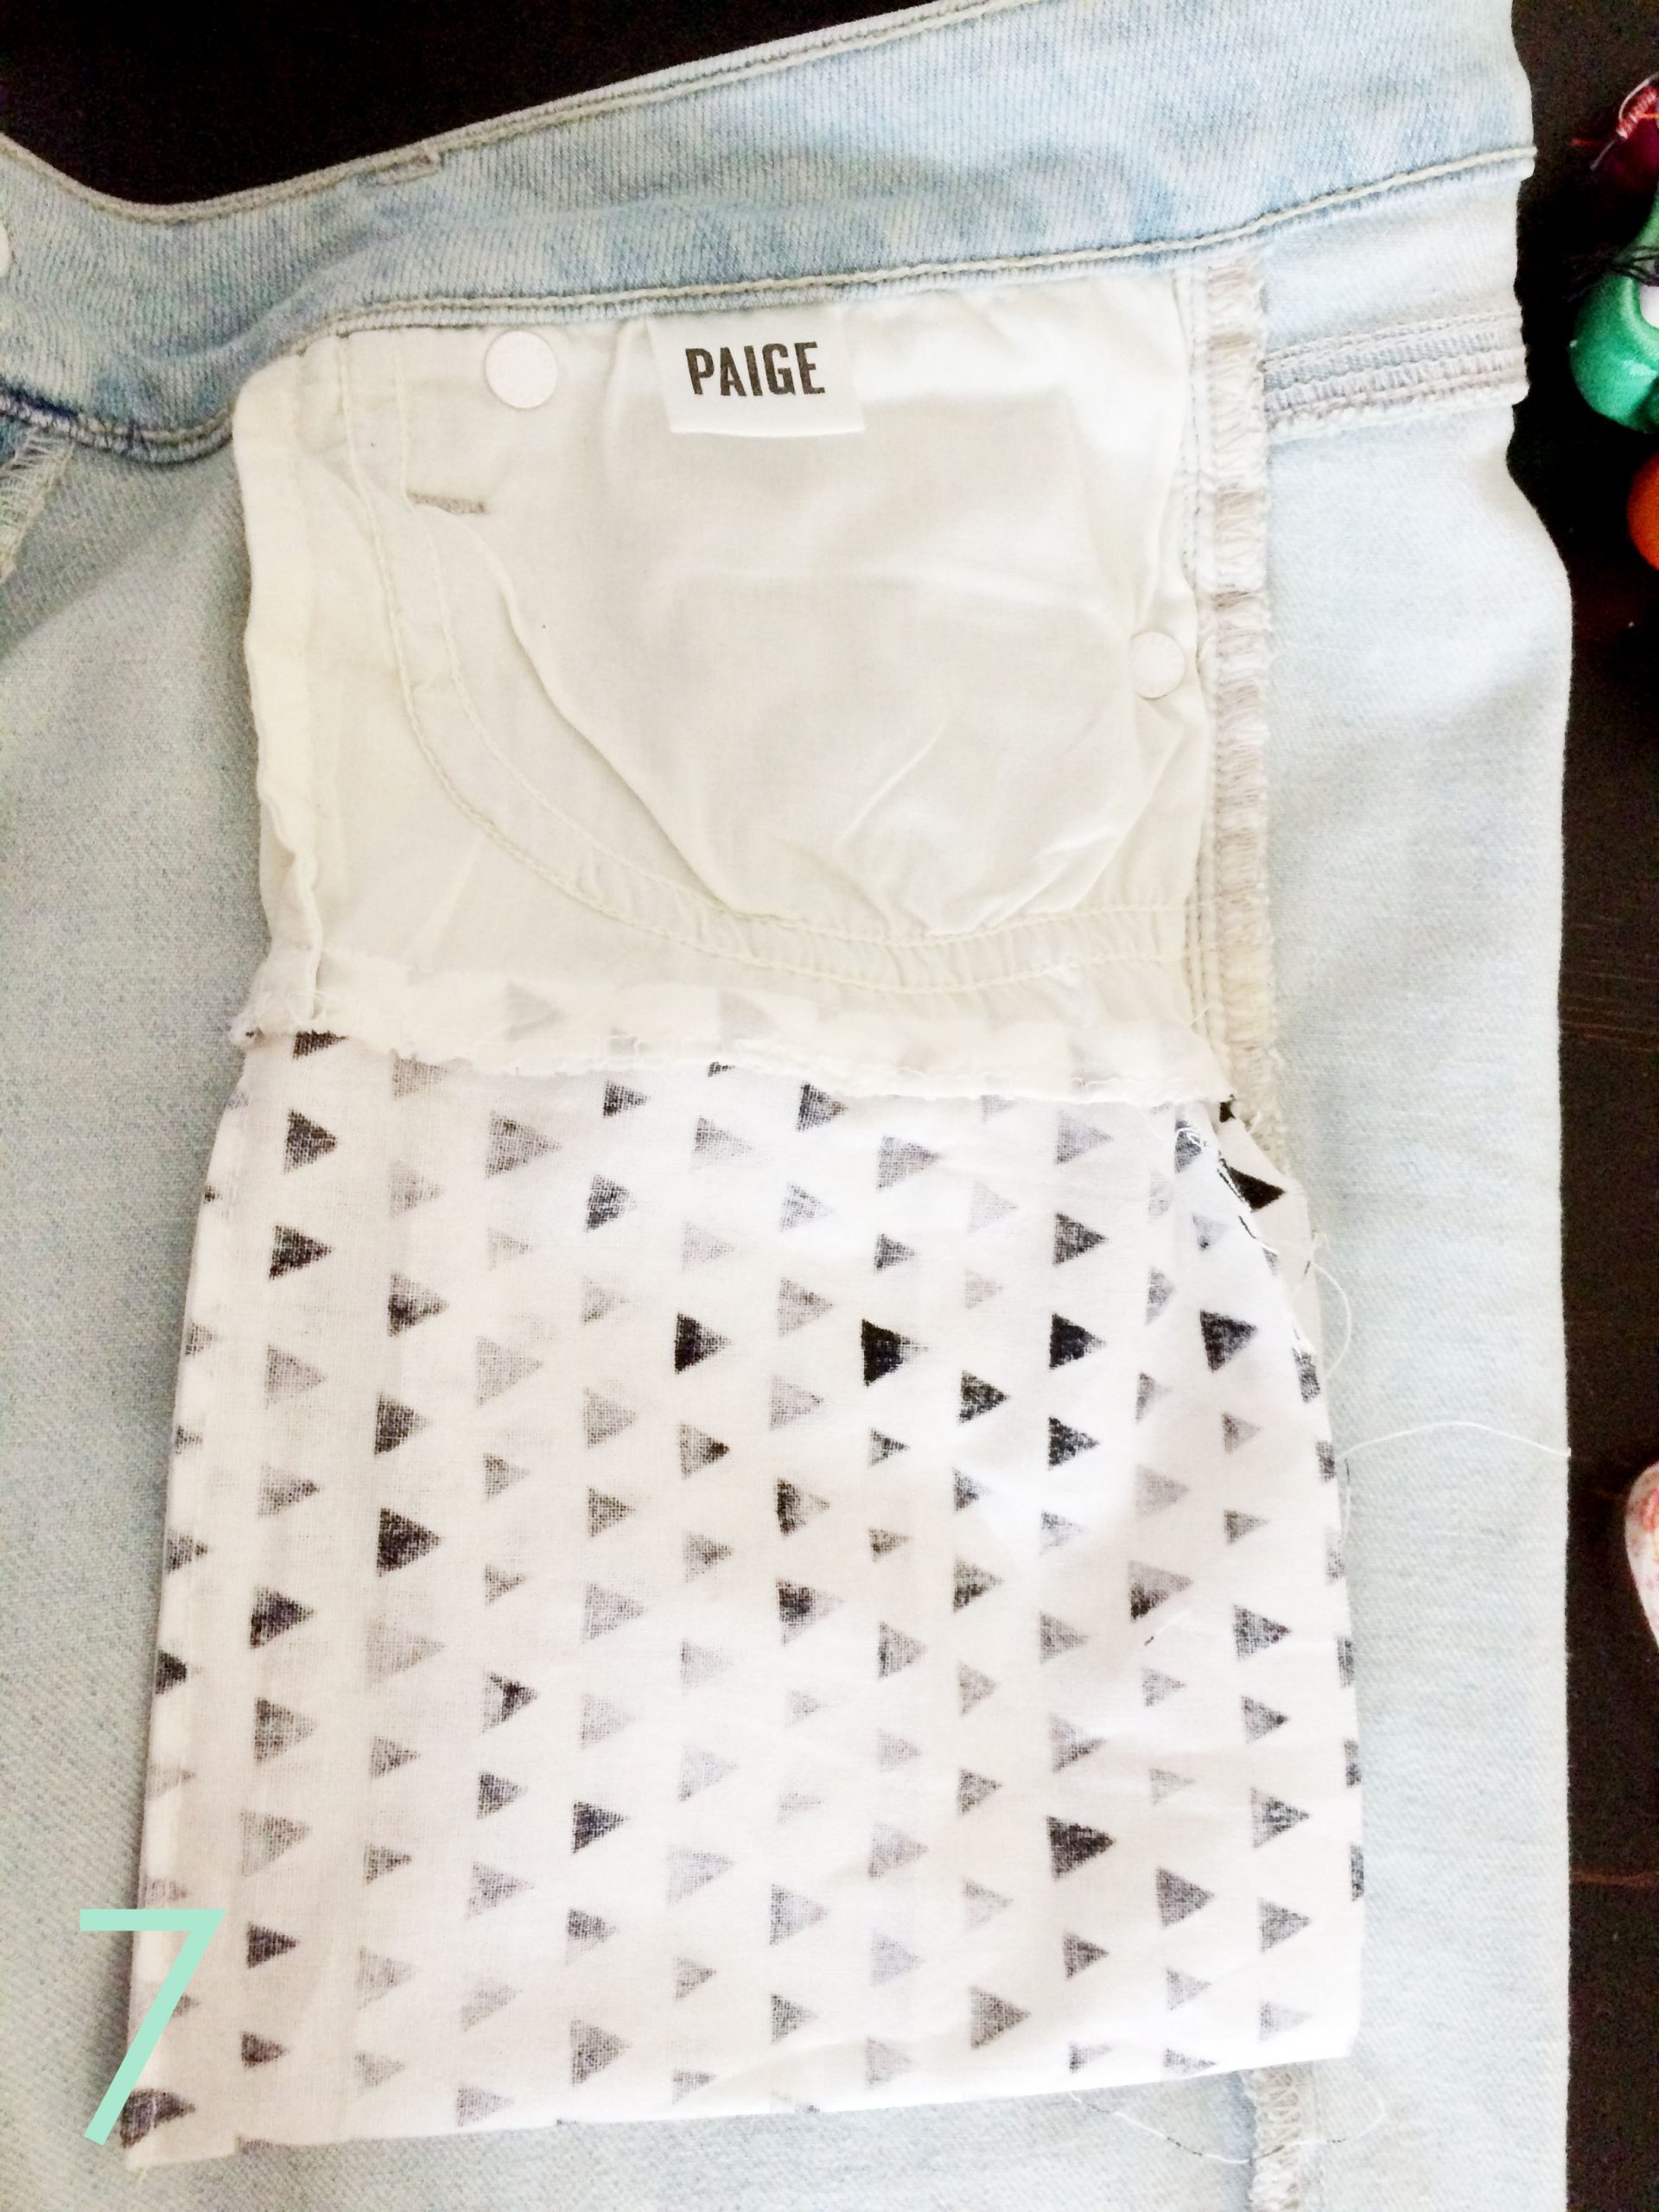
- Pull the new pocket to the outside of the work. Flatten the pocket down, with the selvage pointing down (towards the new pocket).
- Snip the old pocket only (do not cut the new pocket!) up to the seamline. Do that on both layers of the old pocket.
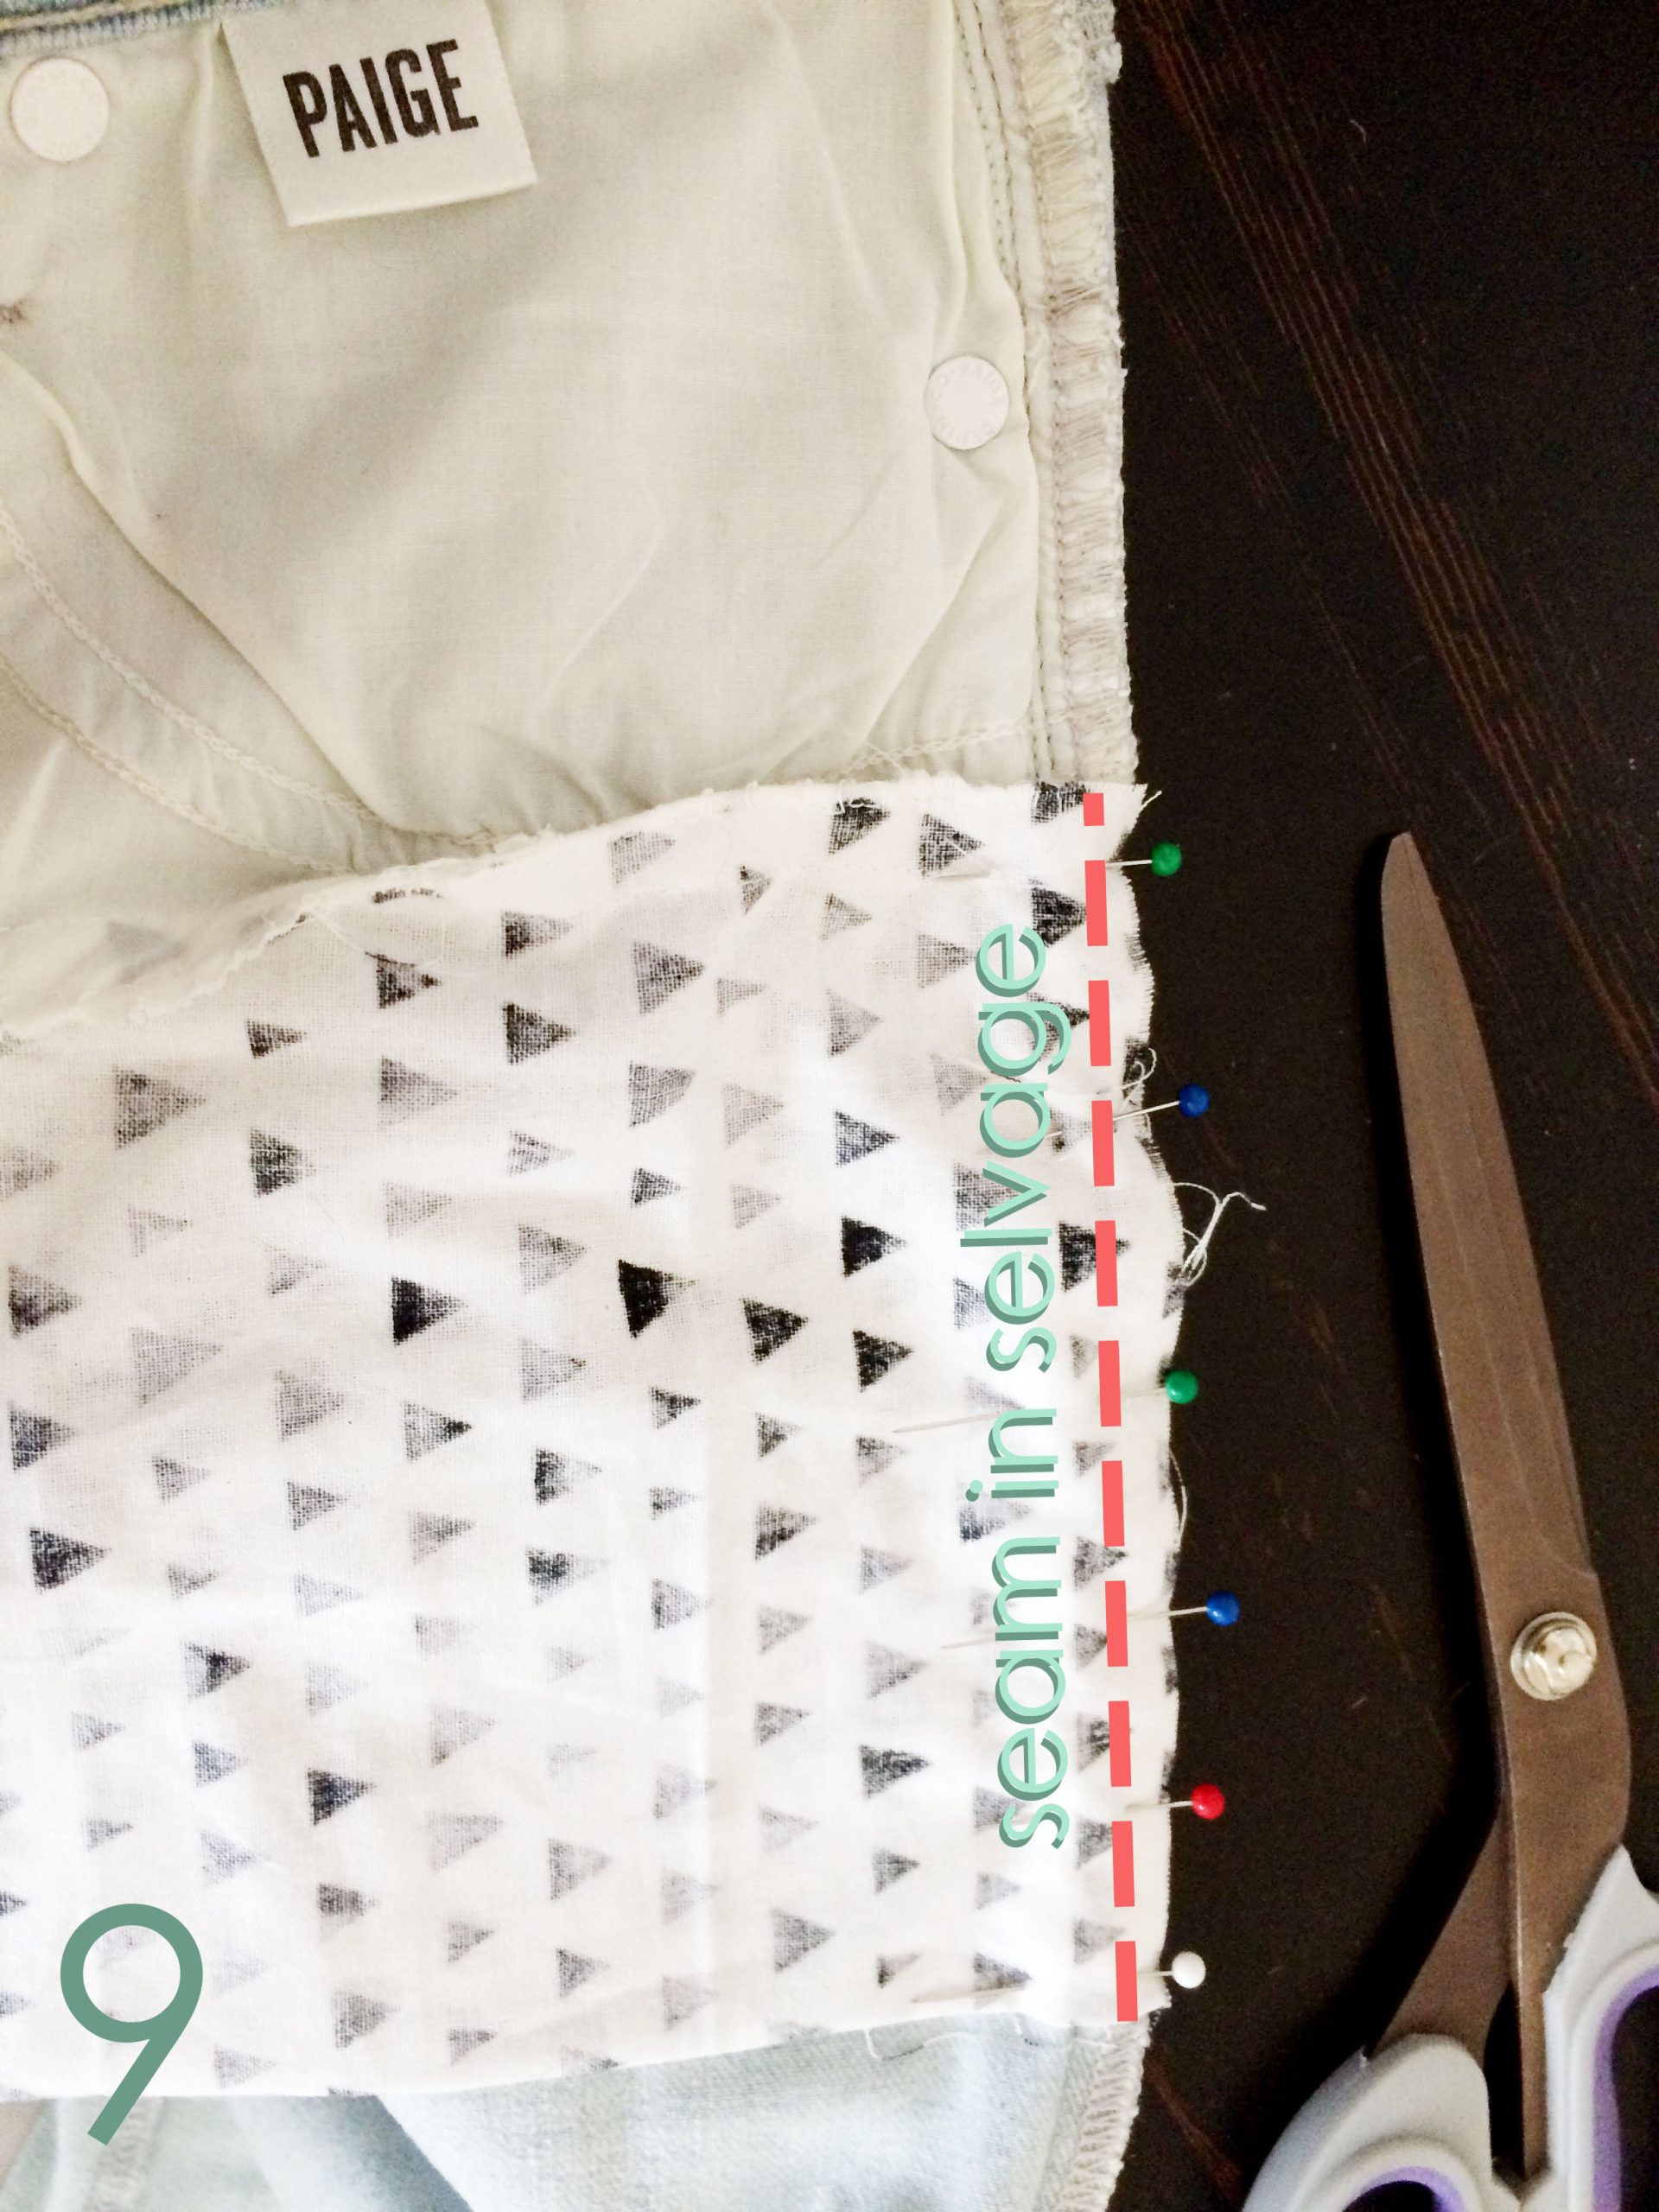
- Smooth the new pocket down to line up with the outer seam of the pants. Overshoot the edge of the pants by about 1/8”. Pin in place. Stitch along the pinned line, making sure to stay in the selvage of the original pant seam!
And you’re all done! Go forth and conquer with your legendary pockets. “Girl pockets” are banished forever!


Thanks this is a perfect project…why didn’t I think of it♀️